Thought I would post up a quick how-to for the New Year. Like many of you, I have boxes of negatives and slides around from my film days. And whereas now you can at least request the negatives on CDs if you still shoot film, there was a time when you couldn’t. I’d explored those cheaper negative scanners, but they just weren’t crisp enough for my purposes. So after scouring the Internet for ideas, I finally came up with one solution that didn’t involve sending them all away to be professionally scanned, or spending $$$$ for a negative scanner. If you take photos on a pretty regular basis, you probably have most of the things you need around. If not, maybe you know someone that does.
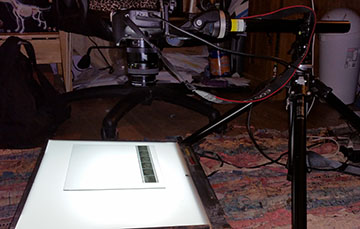 First, you need a good light source. I happen to have an old lightbox hanging around, so I dusted it off and put it to use again. I have seen someone else use a tablet with an all white background. Either would work, but it has to be a large even surface for the light, you can’t just put a spotlight behind the negative.
Then I found a clean piece of glass. Negatives, especially 35mm ones, tend to curl a bit, so I wanted something clean and clear to hold it flat.
I used my digital SLR with a macro lens to capture the shots, but there isn’t any reason that you couldn’t use a point and shoot if it has macro capability (and most do these days). However, unless you have the ability to hold like a statue, you will need a tripod. Macro shooting can be tricky in that things go in and out of focus with a mm worth of movement, so it’s better to have a steady base. Then the camera has to be perpendicular to the negative surface. If you shoot at an angle, only part of the negative is likely to be in focus (remember depth of field is much shallower in macro). I actually got a tripod arm for Christmas, that has come in handy because the camera can be directly over the negative; however, before that, I just put my light source at a slight angle to match up with the angle of the camera lens.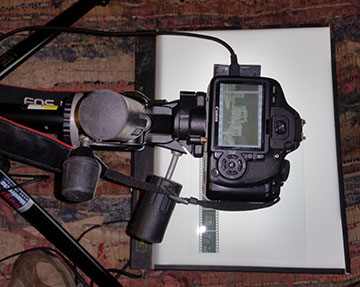
Despite the light source, you will find that the meter reading will appear dark to the camera. That’s because it’s shooting at the negative over the light. I wanted to make sure I had a decent depth of field, so I set my camera to ISO 200, at 1/20th of a second, with shutter priority. I found that at ISO 200, the aperture was usually around f8, depending on the negative.
One very important note – BEWARE OF DUST! That includes on your light source, the glass, the negative, and the camera. Shooting negatives that are around an inch or so to end up being full sized photographs mean that there is no forgiveness for dust. Keep it clean, or you will have lots of spots, hairs, etc. in your finished products.
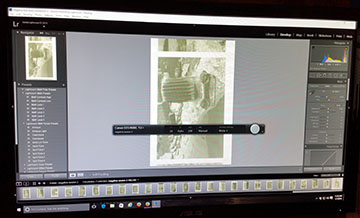
So, you’re ready to shoot. You can just save it to the memory card, and download later. If you have the capability, I suggest shooting tethered to a program like Adobe’s Lightroom. Every shot you take appears almost instantly on your computer monitor, and if there is an issue, you can retake it before you move on to the next shot. If you don’t have that capability, never fear, but you might just want to shoot a few at a time until you get the process down, and are confident you won’t have to go back and find that one shot you missed wiping a dog hair off of to re-shoot.
Great, you captured your negatives and slides digitally onto a memory card. Now what? Well slides are a little easier because they are positives. It’s just a matter of cropping, color-correcting, and fixing those dust spots you missed in a photo editor, and you’re good to go. But negatives are a little trickier. You need to open the file in a photo editor, and “invert” the image. That option should be in any photo editor you use, whether it’s Photoshop, Photoshop Elements, The Gimp (free), Google Photos, etc. Once inverted, you can adjust the exposure, contrast, etc. I will remind you that if you are digitizing B&W film, make sure to change the mode in the editor to grayscale to get rid of that weird shade you see as a color file.
That’s basically it. It may take a couple of tries to get it right, but it’s worth it. I’m having fun bringing new life into these old photos, especially the ones of places I haven’t been back to.
